Physical Address
42°26′05″N 83°59′06″W
Physical Address
42°26′05″N 83°59′06″W
Time to complete: 2-3 hours
Monthly cost: ~$12.50 ($12 DigitalOcean + $0.50 AWS S3)
Prerequisites: Part 1 (component selection), domain registered with Cloudflare DNS, basic Linux familiarity
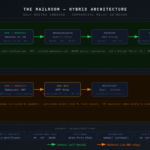
In Part 1, we selected components and justified the hybrid architecture: self-hosted mail server for receiving with commercial relay for sending. This article walks through the actual deployment, ending with a fully functional mail server that can receive email and provide IMAP access.
We’ll also confront the reality of outbound email delivery for small self-hosted servers—specifically why AWS SES denied our production access request and what we’re doing about it.
What you’ll have by the end:
Create a $6/month DigitalOcean droplet with these specifications:
mail-[your-domain]After the droplet is created, note the IP address and log in:
# Connect to your server
ssh root@[your-droplet-ip]

# You should see the Ubuntu welcome message
Update the system immediately:
# Update package lists
sudo apt update

# Upgrade all packages
sudo apt upgrade -y

# This may take 2-5 minutes
Set the hostname properly:
# Set the fully qualified domain name
sudo hostnamectl set-hostname mail.[your-domain].com

# Verify it was set
hostname -f
# Should output: mail.[your-domain].com
Configure the firewall (UFW) before anything else:
This is critical—configure all ports before enabling the firewall to avoid locking yourself out.
# Check current status (should be inactive)
sudo ufw status

# Set default policies
sudo ufw default deny incoming
sudo ufw default allow outgoing

# Allow SSH FIRST (critical - don't skip this!)
sudo ufw allow 22/tcp
# Output: Rules updated

# Allow mail server ports
sudo ufw allow 25/tcp    # SMTP (receiving mail from other servers)
sudo ufw allow 587/tcp   # SMTP submission (authenticated sending)
sudo ufw allow 993/tcp   # IMAPS (encrypted IMAP)

# Allow web ports for Let's Encrypt and future webmail
sudo ufw allow 80/tcp    # HTTP (Let's Encrypt challenge)
sudo ufw allow 443/tcp   # HTTPS (webmail)

# Enable the firewall
sudo ufw enable
# Press 'y' when prompted

# Verify all rules are in place
sudo ufw status verbose
Expected output:
To                         Action      From
--                         ------      ----
22/tcp                     ALLOW       Anywhere
25/tcp                     ALLOW       Anywhere
587/tcp                    ALLOW       Anywhere
993/tcp                    ALLOW       Anywhere
80/tcp                     ALLOW       Anywhere
443/tcp                    ALLOW       Anywhere
Create a non-root administrative user:
Running everything as root is a security risk. Create a dedicated user:
# Create user (you'll be prompted for password and info)
adduser [username]

# Add to sudo group for administrative privileges
usermod -aG sudo [username]

# Verify user was created
id [username]
# Should show uid, gid, and groups including sudo
For the rest of this guide, you can continue as root for service configuration, or switch to your new user with su - [username]. Service installation and configuration typically require sudo/root access.
Common issue: If you enable UFW before allowing port 22, you’ll be locked out immediately. Use DigitalOcean’s web console (droplet → Access → Launch Droplet Console) to regain access and run ufw allow 22/tcp && ufw reload.
Configure these records in Cloudflare before installing mail software. DNS propagation takes 2-10 minutes, so we set this up first.
Log into Cloudflare and select your domain.
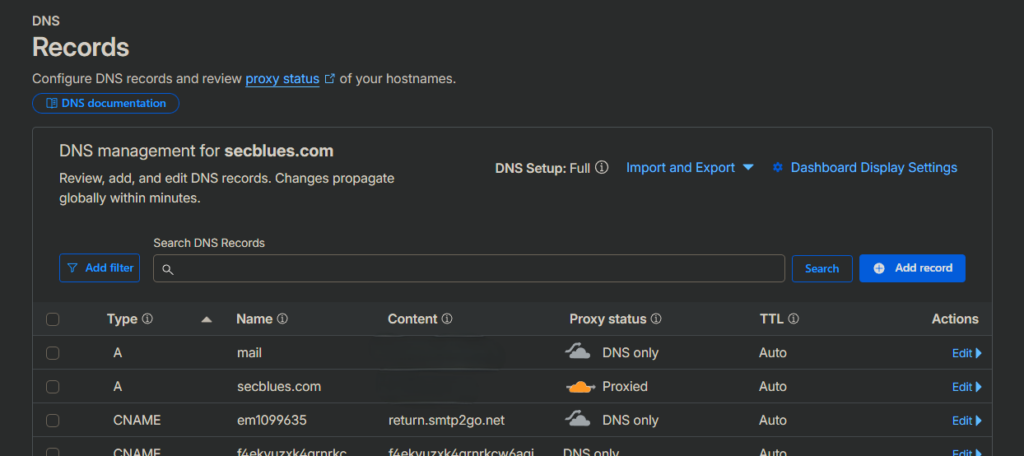
Navigate to DNS → Records, then add each of these:
1. A Record (Mail Server IP):
Type: A
Name: mail
Content: [your-droplet-ip]
Proxy status: DNS only (gray cloud - CRITICAL)
TTL: Auto
Click “Save”. The proxy status must be DNS only (gray cloud icon, not orange). SMTP and IMAP protocols don’t work through Cloudflare’s HTTP proxy.
2. MX Record (Mail Destination):
Type: MX
Name: @ (or leave blank for root domain)
Mail server: mail.[your-domain].com
Priority: 10
Proxy status: DNS only
TTL: Auto
The priority value (10) determines which server receives mail if you have multiple MX records. Lower numbers have higher priority.
3. SPF Record (Sender Policy Framework):
Type: TXT
Name: @ (root domain)
Content: v=spf1 ip4:[your-droplet-ip] include:amazonses.com -all
TTL: Auto
This tells receiving servers which IPs are authorized to send mail from your domain. The -all means “reject all other senders.”
4. DMARC Record (Domain-based Message Authentication):
Type: TXT
Name: _dmarc
Content: v=DMARC1; p=none; rua=mailto:dmarc@[your-domain].com
TTL: Auto
DMARC tells receiving servers what to do with mail that fails SPF/DKIM checks. p=none is monitoring mode—good for initial setup. The rua address receives aggregate reports.
Your DNS records should now look like this:
| Type | Name | Content | Proxy |
|---|---|---|---|
| A | [your-ip] | DNS only | |
| A | @ | [wordpress-ip] | Proxied |
| MX | @ | mail.[your-domain].com (priority 10) | – |
| TXT | @ | v=spf1 ip4:[your-ip] include:amazonses.com -all | – |
| TXT | _dmarc | v=DMARC1; p=none; rua=mailto:dmarc@… | – |
| CNAME | www | [your-domain].com | Proxied |
Configure PTR Record (Reverse DNS):
PTR records map IP addresses back to hostnames. Many mail servers reject email if the sending IP doesn’t have a proper PTR record.
In DigitalOcean:
mail.[your-domain].comSome DigitalOcean regions show this differently—if you don’t see it, check Networking → Domains or submit a support ticket.
Wait 2-5 minutes for DNS propagation, then verify from your mail server:
# Test A record (should return your droplet IP)
dig mail.[your-domain].com +short

# Expected output:
# [your-droplet-ip]

# Test MX record
dig MX [your-domain].com +short

# Expected output:
# 10 mail.[your-domain].com.

# Test SPF record
dig TXT [your-domain].com +short

# Expected output (among other TXT records):
# "v=spf1 ip4:[your-droplet-ip] include:amazonses.com -all"

# Test PTR record (reverse lookup)
dig -x [your-droplet-ip] +short

# Expected output:
# mail.[your-domain].com.
If any of these fail, wait a few more minutes and try again. DNS propagation can take up to 10 minutes, occasionally longer.
Common issues:
dig mail.[your-domain].com returns 127.0.0.1: The server is resolving via /etc/hosts. Check and remove any lines containing your mail hostname:# Check hosts file
cat /etc/hosts
# If you see mail.[your-domain].com mapped to 127.0.0.1, edit and remove it
sudo nano /etc/hosts
# Delete the offending line, save and exit
# Flush DNS cache
sudo systemd-resolve --flush-caches
sudo systemctl restart systemd-resolved
# Test again
dig mail.[your-domain].com +short
Modern email requires TLS encryption. We’ll use Let’s Encrypt to get free, trusted certificates that auto-renew.
Install Certbot:
# Install certbot and dependencies
sudo apt install certbot -y

# Verify installation
certbot --version
# Should show: certbot 2.x.x
Obtain certificates using standalone mode:
Standalone mode temporarily runs a web server on port 80 for the Let’s Encrypt ACME challenge. This is why we opened port 80 in the firewall earlier.
# Request certificates
sudo certbot certonly --standalone -d mail.[your-domain].com
You’ll be prompted for:
Enter email address (used for urgent renewal and security notices): [email protected]A and press Enter to agree Please read the Terms of Service at https://letsencrypt.org/documents/LE-SA-v1.3... (A)gree/(C)ancel: AY or N (your choice) Would you be willing to share your email with the Electronic Frontier Foundation? (Y)es/(N)o: NExpected output on success:
Successfully received certificate.
Certificate is saved at: /etc/letsencrypt/live/mail.[your-domain].com/fullchain.pem
Key is saved at:         /etc/letsencrypt/live/mail.[your-domain].com/privkey.pem
This certificate expires on 2026-05-13.
These files will be updated when the certificate renews.
Certbot has set up a scheduled task to automatically renew this certificate in the background.
Verify certificate files exist:
# List certificate directory
sudo ls -la /etc/letsencrypt/live/mail.[your-domain].com/

# You should see:
# cert.pem -> ../../archive/mail.[your-domain].com/cert1.pem
# chain.pem -> ../../archive/mail.[your-domain].com/chain1.pem
# fullchain.pem -> ../../archive/mail.[your-domain].com/fullchain1.pem
# privkey.pem -> ../../archive/mail.[your-domain].com/privkey1.pem
The files you’ll use in configuration:
Verify auto-renewal is configured:
Let’s Encrypt certificates expire after 90 days. Certbot automatically sets up a systemd timer to renew them.
# Check renewal timer status
sudo systemctl status certbot.timer

# Should show: active (waiting)
Test the renewal process (dry-run):
# Simulate renewal without actually renewing
sudo certbot renew --dry-run

# Should end with: Congratulations, all simulated renewals succeeded
This confirms that renewal will work when needed.
Common issues:
sudo ufw status | grep 80). Some hosting providers also have network-level firewalls—check DigitalOcean’s Cloud Firewall settings if enabled.mail.[your-domain].com. Check that your A record exists and propagated with dig mail.[your-domain].com +short.
Postfix is the MTA (Mail Transfer Agent) that handles receiving mail from other servers and routing it to user mailboxes.
Install Postfix:
sudo apt install postfix -y
During installation, a configuration screen will appear:
[your-domain].com (without the mail. prefix)The installation configures Postfix with basic settings. We’ll customize it next.
Backup the original configuration:
# Always backup before editing
sudo cp /etc/postfix/main.cf /etc/postfix/main.cf.backup

# Verify backup exists
ls -la /etc/postfix/*.backup
Edit the main configuration file:
sudo nano /etc/postfix/main.cf
Verify these basic settings (they should already be set from installation, around lines 30-50):
myhostname = mail.[your-domain].com
mydomain = [your-domain].com
myorigin = $mydomain
mydestination = $myhostname, localhost.$mydomain, localhost, $mydomain
inet_interfaces = all
inet_protocols = ipv4
What these mean:
myhostname: The server’s fully qualified domain namemydomain: Your email domainmyorigin: What domain appears in mail sent from this servermydestination: Domains this server accepts mail for (local delivery)inet_interfaces: Listen on all network interfaces (not just localhost)inet_protocols: Use IPv4 only (simplifies configuration)Scroll to the end of the file and add these sections:
# ====== Maildir Configuration ======
home_mailbox = Maildir/
mailbox_command =

# ====== TLS Configuration ======
smtpd_tls_cert_file=/etc/letsencrypt/live/mail.[your-domain].com/fullchain.pem
smtpd_tls_key_file=/etc/letsencrypt/live/mail.[your-domain].com/privkey.pem
smtpd_tls_security_level=may
smtpd_tls_loglevel = 1
smtpd_tls_session_cache_database = btree:${data_directory}/smtpd_scache

smtp_tls_CApath=/etc/ssl/certs
smtp_tls_security_level=may
smtp_tls_session_cache_database = btree:${data_directory}/smtp_scache

# ====== SASL Authentication ======
smtpd_sasl_type = dovecot
smtpd_sasl_path = private/auth
smtpd_sasl_auth_enable = yes
smtpd_sasl_security_options = noanonymous
smtpd_sasl_local_domain = $myhostname

# ====== Recipient Restrictions ======
smtpd_recipient_restrictions =
    permit_mynetworks,
    permit_sasl_authenticated,
    reject_unauth_destination
Configuration explanations:
Maildir:
home_mailbox = Maildir/: Store mail in ~/Maildir/ instead of /var/mail/usernamemailbox_command =: Empty value disables any custom delivery agentWhy Maildir over mbox:
TLS Settings:
smtpd_tls_cert_file/key_file: Point to Let’s Encrypt certificatessmtpd_tls_security_level=may: Offer TLS but don’t require it (some servers don’t support it)smtpd_tls_loglevel = 1: Log TLS connections for debuggingSASL Authentication:
smtpd_sasl_type = dovecot: Use Dovecot for authenticationsmtpd_sasl_path = private/auth: Socket path where Dovecot listenssmtpd_sasl_auth_enable = yes: Enable SASL authenticationnoanonymous: Don’t allow anonymous authenticationRecipient Restrictions:
permit_mynetworks: Allow mail from localhostpermit_sasl_authenticated: Allow mail from authenticated usersreject_unauth_destination: Reject mail to external domains (prevents open relay)Save and exit: Ctrl+X, Y, Enter
Check for configuration errors:
# Postfix will report syntax errors
sudo postfix check

# If there are no errors, nothing is printed
# If there are errors, fix them before proceeding
Restart Postfix to apply changes:
# Restart the service
sudo systemctl restart postfix

# Check status
sudo systemctl status postfix
Expected output:
● postfix.service - Postfix Mail Transport Agent
     Loaded: loaded (/lib/systemd/system/postfix.service; enabled)
     Active: active (exited) since Wed 2026-02-12 18:10:22 UTC
Verify Postfix is listening on port 25:
sudo ss -tlnp | grep :25
Expected output:
LISTEN 0 100 0.0.0.0:25 0.0.0.0:* users:(("master",pid=12345,fd=13))
This confirms Postfix is listening on all interfaces (0.0.0.0) on port 25.
Check Postfix logs for any errors:
# View recent Postfix logs
sudo journalctl -u postfix -n 50 --no-pager

# Look for lines like:
# postfix/master[xxxxx]: daemon started -- version 3.x.x
If you see errors, address them before proceeding.
Common issues:
sudo postfix check for details. Common issues:
sudo lsof -i :25sudo ls -la /etc/letsencrypt/live/mail.[your-domain].com/ # Should be readable by rootDovecot provides IMAP access so email clients can retrieve mail. It also handles authentication for Postfix.
Install Dovecot packages:
# Install core Dovecot and IMAP daemon
sudo apt install dovecot-core dovecot-imapd dovecot-lmtpd -y

# Verify installation
dovecot --version
# Should show: 2.3.x or higher
Dovecot configuration is split across multiple files in /etc/dovecot/conf.d/. We’ll edit four key files.
1. Configure Authentication (10-auth.conf):
sudo nano /etc/dovecot/conf.d/10-auth.conf
Find and modify (around line 10):
disable_plaintext_auth = yes
This prevents password transmission without TLS. Uncommitted if it has a # at the start.
Find and modify (around line 100):
auth_mechanisms = plain login
This enables standard authentication methods. Again, remove # if present.
What this does: Requires TLS before accepting passwords (disable_plaintext_auth), and accepts both PLAIN and LOGIN auth methods (compatible with all email clients).
Save and exit: Ctrl+X, Y, Enter
2. Configure Mail Location (10-mail.conf):
sudo nano /etc/dovecot/conf.d/10-mail.conf
Find and set (around line 30):
mail_location = maildir:~/Maildir
Remove the # if present. This tells Dovecot to look for mail in each user’s ~/Maildir directory.
Save and exit: Ctrl+X, Y, Enter
3. Configure SSL/TLS (10-ssl.conf):
sudo nano /etc/dovecot/conf.d/10-ssl.conf
Find and set (around line 6):
ssl = required
Change from ssl = yes to ssl = required to enforce TLS.
Find and modify (around lines 12-14):
ssl_cert = </etc/letsencrypt/live/mail.[your-domain].com/fullchain.pem
ssl_key = </etc/letsencrypt/live/mail.[your-domain].com/privkey.pem
Important: Note the < before the path. This tells Dovecot to read the file contents.
Replace the default paths (pointing to /etc/dovecot/private) with your Let’s Encrypt certificates.
Save and exit: Ctrl+X, Y, Enter
4. Configure Postfix Authentication Socket (10-master.conf):
This is the most critical configuration—it allows Postfix to authenticate users via Dovecot.
sudo nano /etc/dovecot/conf.d/10-master.conf
Find the service auth section (around line 95). It will look like:
service auth {
  # auth_socket_path points to this userdb socket by default. It's typically
  # used by dovecot-lda, doveadm, possibly imap process, etc. Users that have
  # full permissions to this socket are able to get a list of all usernames and
  # get the results of everyone's userdb lookups.
  #
  # The default 0666 mode allows anyone to connect to the socket, but the
  # userdb lookups will succeed only if the userdb returns an "uid" field that
  # matches the caller process's UID. Also if caller's uid or gid matches the
  # socket's uid or gid the lookup succeeds. Anything else causes a failure.
  #
  # To give the caller full permissions to lookup all users, set the mode to
  # something else than 0666 and Dovecot lets the kernel enforce the
  # permissions (e.g. 0777 allows everyone full permissions).
  unix_listener auth-userdb {
    #mode = 0666
    #user =
    #group =
  }
}
Replace the entire service auth section with:
service auth {
  unix_listener auth-userdb {
    #mode = 0666
    #user =
    #group =
  }

  # Postfix smtp-auth
  unix_listener /var/spool/postfix/private/auth {
    mode = 0660
    user = postfix
    group = postfix
  }
}
What this does: Creates a Unix socket at /var/spool/postfix/private/auth that Postfix can use to verify user credentials. The permissions (0660) and ownership (postfix:postfix) allow Postfix to access it.
Save and exit: Ctrl+X, Y, Enter
Add Dovecot user to Postfix group:
This ensures Dovecot has permission to create the socket in Postfix’s directory:
# Add dovecot to postfix group
sudo usermod -aG postfix dovecot

# Verify
groups dovecot
# Should show: dovecot : dovecot postfix
Ensure the private directory exists with correct permissions:
# Check if directory exists
sudo ls -la /var/spool/postfix/private/

# If it doesn't exist, create it
sudo mkdir -p /var/spool/postfix/private/

# Set ownership and permissions
sudo chown postfix:postfix /var/spool/postfix/private/
sudo chmod 750 /var/spool/postfix/private/
Restart Dovecot:
# Restart to apply all configuration changes
sudo systemctl restart dovecot

# Check status
sudo systemctl status dovecot
Expected output:
● dovecot.service - Dovecot IMAP/POP3 email server
     Loaded: loaded (/lib/systemd/system/dovecot.service; enabled)
     Active: active (running) since Wed 2026-02-12 18:15:30 UTC
Verify the authentication socket was created:
sudo ls -la /var/spool/postfix/private/auth
Expected output:
srw-rw---- 1 postfix postfix 0 Feb 12 18:15 /var/spool/postfix/private/auth
The s indicates a socket file, and permissions rw-rw---- mean read/write for user and group (postfix).
Verify Dovecot is listening on port 993:
sudo ss -tlnp | grep :993
Expected output:
LISTEN 0 100 0.0.0.0:993 0.0.0.0:* users:(("dovecot",pid=31055,fd=37))
Check Dovecot logs:
sudo journalctl -u dovecot -n 50 --no-pager
Look for:
master: Dovecot v2.3.x starting upCommon issues:
# Verify dovecot is in postfix group groups dovecot # Restart both services in order sudo systemctl restart dovecot sudo systemctl restart postfix # Check again sudo ls -la /var/spool/postfix/private/authsudo journalctl -u dovecot -n 100 --no-pager | grep -i errorsudo ls -la /etc/letsencrypt/live/mail.[your-domain].com/ sudo dovecot -n | grep ssl_certsudo doveconf -n # Will show the error locationPort 587 is the standard port for mail submission (sending) with authentication. We’ll enable it now so it’s ready for future SMTP relay configuration.
Edit Postfix master configuration:
sudo nano /etc/postfix/master.cf
Find the submission section (around lines 17-30). It will be commented out with # symbols:
#submission inet n       -       y       -       -       smtpd
#  -o syslog_name=postfix/submission
#  -o smtpd_tls_security_level=encrypt
#  -o smtpd_sasl_auth_enable=yes
Uncomment and configure it to look like this (remove ALL # symbols from these lines):
submission inet n       -       y       -       -       smtpd
  -o syslog_name=postfix/submission
  -o smtpd_tls_security_level=encrypt
  -o smtpd_sasl_auth_enable=yes
  -o smtpd_tls_auth_only=yes
  -o smtpd_reject_unlisted_recipient=no
  -o smtpd_client_restrictions=permit_sasl_authenticated,reject
  -o smtpd_recipient_restrictions=
  -o smtpd_relay_restrictions=permit_sasl_authenticated,reject
Important: The lines starting with -o must have leading spaces (not tabs). They are option overrides for this specific service.
What each option does:
syslog_name=postfix/submission: Log entries clearly marked for port 587smtpd_tls_security_level=encrypt: Require TLS (unlike port 25 which is optional)smtpd_sasl_auth_enable=yes: Enable authenticationsmtpd_tls_auth_only=yes: Only allow authentication over TLSsmtpd_reject_unlisted_recipient=no: Accept mail for any domain (relay it)smtpd_client_restrictions=permit_sasl_authenticated,reject: Only authenticated userssmtpd_relay_restrictions=permit_sasl_authenticated,reject: Only relay for authenticated usersWhy port 587 instead of 465:
Note about port 465: There’s a submissions section further down in master.cf. Leave it commented out for now. We’re only using port 587.
Save and exit: Ctrl+X, Y, Enter
Restart Postfix to enable the submission port:
sudo systemctl restart postfix

# Check for any errors
sudo systemctl status postfix
Verify port 587 is now listening:
sudo ss -tlnp | grep :587
Expected output:
LISTEN 0 100 0.0.0.0:587 0.0.0.0:* users:(("master",pid=31782,fd=14))
Verify all three mail ports are listening:
sudo ss -tlnp | grep -E ':(25|587|993)'
Expected output:
LISTEN 0    100    0.0.0.0:25     0.0.0.0:*    users:(("master",pid=31782,fd=13))
LISTEN 0    100    0.0.0.0:587    0.0.0.0:*    users:(("master",pid=31782,fd=14))
LISTEN 0    100    0.0.0.0:993    0.0.0.0:*    users:(("dovecot",pid=31055,fd=37))
All three ports should show “LISTEN”.
Common issue: If port 587 doesn’t appear, check that you uncommented all the submission lines and that there are no syntax errors:
# Check for configuration errors
sudo postfix check

# View recent Postfix logs for errors
sudo journalctl -u postfix -n 30 --no-pager
Now that Postfix and Dovecot are configured, create a user account and test that email actually works.
Create a system user for email:
# Create user (choose a username - we'll use "collin" as an example)
sudo adduser collin
You’ll be prompted for:
Create the Maildir structure:
Even though Postfix will create Maildir automatically on first delivery, it’s better to create it now with correct permissions:
# Create Maildir for the user
sudo -u collin maildirmake.dovecot /home/collin/Maildir

# Verify it was created
sudo ls -la /home/collin/

# You should see: drwx------ Maildir/
Set proper permissions:
# Ensure ownership is correct
sudo chown -R collin:collin /home/collin/Maildir

# Ensure permissions are restrictive (only user can read)
sudo chmod -R 700 /home/collin/Maildir

# Verify
sudo ls -la /home/collin/Maildir/
Expected Maildir structure:
drwx------ 5 collin collin 4096 Feb 12 18:49 .
drwx------ 3 collin collin 4096 Feb 12 18:49 ..
drwx------ 2 collin collin 4096 Feb 12 18:49 cur
drwx------ 2 collin collin 4096 Feb 12 18:49 new
drwx------ 2 collin collin 4096 Feb 12 18:49 tmp
The three subdirectories:
new/ – Unread messagescur/ – Read messagestmp/ – Temporary files during deliverySend a test email from external provider:
Using Gmail, ProtonMail, or any other email account, send an email to:
collin@[your-domain].com
Subject: Test Email
Body: Testing my new mail server!
Wait 10-30 seconds for delivery, then check the logs:
# Watch for the delivery in real-time
sudo journalctl -u postfix -f

# Press Ctrl+C to stop watching
Or check recent entries:
# View last 50 Postfix log entries
sudo journalctl -u postfix -n 50 --no-pager

# Search specifically for delivered messages
sudo journalctl -u postfix --no-pager | grep -i delivered
Look for a line like:
postfix/local[32242]: 8AE4841E68: to=<collin@[your-domain].com>, relay=local, delay=0.18, delays=0.16/0.01/0/0, dsn=2.0.0, status=sent (delivered to mailbox)
The key part is status=sent (delivered to mailbox).
Check if the email file exists:
# List new mail
sudo ls -la /home/collin/Maildir/new/

# You should see a file with a name like:
# 1707683045.V801I12345M654321.mail
Read the email (optional):
# View the raw email
sudo cat /home/collin/Maildir/new/*
You’ll see the full email including all headers, which is useful for debugging.
Test IMAP access with an email client:
Now configure an email client to make sure IMAP works. Use any of these:
IMAP Settings:
Server: mail.[your-domain].com
Port: 993
Connection security: SSL/TLS
Authentication: Normal password
Username: collin
Password: [the password you set for collin user]
SMTP Settings (for future sending):
Server: mail.[your-domain].com
Port: 587
Connection security: STARTTLS
Authentication: Normal password
Username: collin
Password: [the password you set for collin user]
In Thunderbird, for example:
You should:
Common issues:
# Check for errors or bounces sudo journalctl -u postfix -n 100 --no-pager | grep -i error # Check mail queue sudo mailq # Should be empty if mail was delivered# Check traditional mailbox location sudo ls -la /var/mail/collin # If mail is there, Postfix isn't using Maildir # Verify main.cf has: home_mailbox = Maildir/ sudo grep "home_mailbox" /etc/postfix/main.cf # Restart Postfix if you changed anything sudo systemctl restart postfix# Verify Dovecot is running sudo systemctl status dovecot # Verify port 993 is listening sudo ss -tlnp | grep :993 # Check Dovecot logs for errors sudo journalctl -u dovecot -n 50 --no-pager# Verify user exists id collin # Try testing authentication manually telnet localhost 143 # Type: a1 LOGIN collin password # Should return: a1 OK Logged in # Type: a2 LOGOUT# Verify certificates are readable sudo ls -la /etc/letsencrypt/live/mail.[your-domain].com/ # Test TLS connection openssl s_client -connect mail.[your-domain].com:993 -quiet # Should show certificate chain and connectIf your email client connects and shows the test email, mail reception is fully working. You can now receive email on your domain and access it via IMAP from any device.
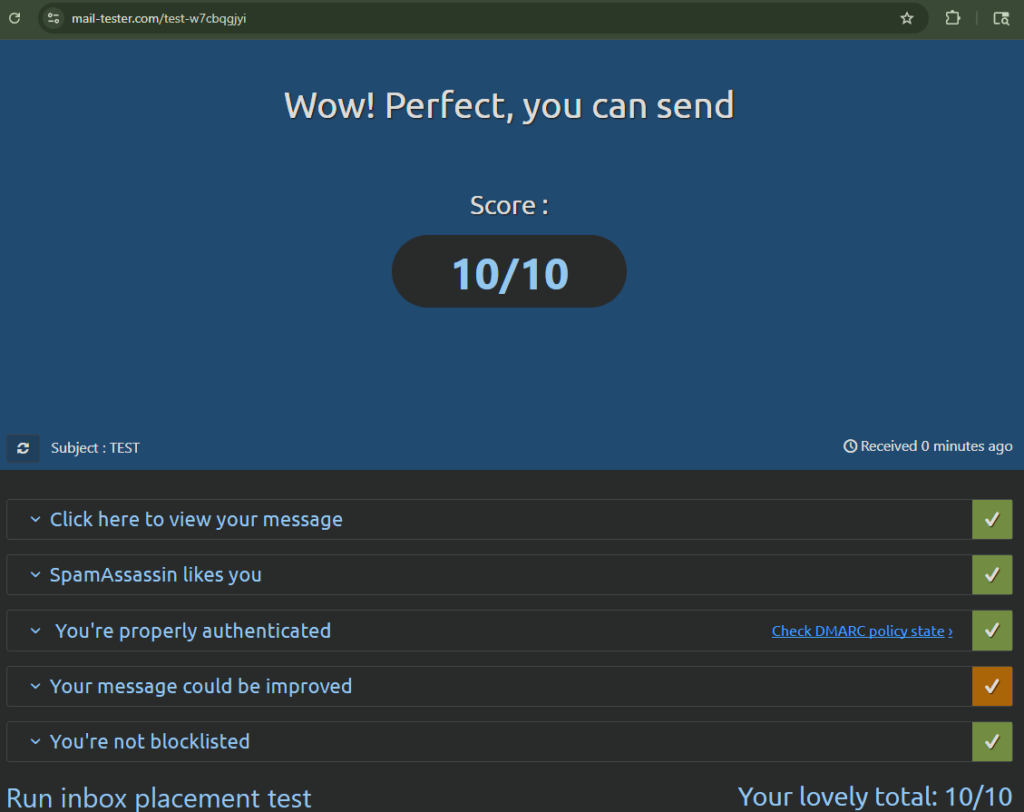
Your mail server can now receive email perfectly. Sending is where things get complicated.
The problem: Email providers (Gmail, Outlook, etc.) evaluate sender reputation based on:
Why VPS IPs struggle:
The solution: Use a commercial SMTP relay service with established IP pools and reputation. They handle deliverability; you handle learning mail infrastructure.
This isn’t defeat—it’s pragmatic architecture. You’re still running the full mail stack, just routing outbound through a reliable path.
Amazon Simple Email Service (SES) was our first choice for outbound relay due to its excellent deliverability and cost-effectiveness ($0.10 per 1,000 emails). Here’s what happened during setup.
Create or log into your AWS account:
Navigate to: https://console.aws.amazon.com/
Access the SES Console:
Verify your domain:
[your-domain].com (without mail. prefix)You’ll see a verification screen with DNS records:
AWS generates three DKIM CNAME records. Copy each one to a text file:
[random-string-1]._domainkey.[your-domain].com → [value-1].dkim.amazonses.com
[random-string-2]._domainkey.[your-domain].com → [value-2].dkim.amazonses.com
[random-string-3]._domainkey.[your-domain].com → [value-3].dkim.amazonses.com
Plus a domain verification TXT record:
_amazonses.[your-domain].com → [verification-code]
Add DKIM records to Cloudflare:
Go to Cloudflare DNS → Add record (do this 3 times):
Type: CNAME
Name: [random-string-1]._domainkey
Target: [value-1].dkim.amazonses.com
Proxy: DNS only
TTL: Auto
Repeat for all three DKIM records. After 2-5 minutes, AWS will verify them and show “Successful” next to DKIM configuration.
Generate SMTP credentials:
These credentials allow Postfix to authenticate with SES as an SMTP relay.
ses-smtp-user-[date]) or customizeSave these in a secure location (password manager). We’ll use them in Part 3 for SMTP2GO, or later when SES is approved.
Request production access:
By default, SES operates in “sandbox mode,” which only allows sending to verified email addresses. For real-world use (like job applications), you need production access.
Fill out the form:
Personal mail server for professional blog ([your-domain].com) and job application correspondence.Low volume (50-100 emails per month). Self-hosted Postfix MTA using SES as SMTP relay for reliable delivery.All mail is individual professional correspondence—no bulk sending or marketing.Monitor SES console daily for bounces and complaints. Remove invalid addresses immediately.Maintain low complaint rate. All recipients are legitimate contacts (job recruiters, blog readers who contacted me).The response (24-48 hours later):
This is what AWS actually sent back:
Hello,
Thank you for submitting your request to increase your sending limits. We would like to gather more information about your use case.
[…]
Due to some limiting factors on your account currently, you are not eligible to send SES messages in US East (Ohio) region. You will need to show a pattern of use of other AWS services and a consistent paid billing history to gain access to this function.
We enforce these limitations on all new accounts. Your continued usage of other AWS services will give us greater flexibility to increase your spending limits in the future.
Please open a new case after you have a successful billing cycle and additional use of other AWS services and we will gladly review your account.
What this means:
AWS is being conservative with new accounts to prevent spammers. They want to see:
This isn’t a permanent “no”—it’s “not yet, prove you’re legitimate first.”
This is frustrating but common. Many new AWS accounts experience this, especially for SES. The solution is to build up AWS usage over 60-90 days, then reapply with evidence of legitimate usage.
Why we’re not giving up on SES:
The strategy:
This approach is both pragmatic (email works now via SMTP2GO) and strategic (positioning for SES approval later).
The strategy to get SES approved: generate consistent AWS usage and billing history while also creating something useful. Automated mail backups to S3 accomplish both.
Benefits:
Install AWS CLI v2:
The awscli package isn’t in Ubuntu 24.04 repositories. Install the official AWS CLI v2:
# Download the installer
curl "https://awscli.amazonaws.com/awscli-exe-linux-x86_64.zip" -o "awscliv2.zip"

# Install unzip if not present
sudo apt install unzip -y

# Unzip the installer
unzip awscliv2.zip

# Run the installer
sudo ./aws/install

# Verify installation
aws --version
# Should show: aws-cli/2.x.x Python/3.x.x Linux/...

# Clean up
rm -rf aws awscliv2.zip
Create IAM user with S3 access:
Don’t use your root AWS account credentials. Create a dedicated IAM user for the mail server:
mail-server-adminSet permissions:
Create access keys for CLI access:
Save your credentials:
You’ll see:
Critical: Click Download .csv file and save it securely. You cannot view the secret again!
Copy both values to use in the next step.
Configure AWS CLI on your mail server:
# Run configuration wizard
aws configure
Enter when prompted:
AWS Access Key ID [None]: AKIA[your-key-here]
AWS Secret Access Key [None]: [your-secret-key-here]
Default region name [None]: us-east-2
Default output format [None]: json
Verify credentials work:
# Test authentication
aws sts get-caller-identity
Expected output:
{
    "UserId": "AIDA...",
    "Account": "123456789012",
    "Arn": "arn:aws:iam::123456789012:user/mail-server-admin"
}
If you see your account number and the mail-server-admin user, configuration is correct.
Create S3 bucket for backups:
Bucket names must be globally unique across all AWS accounts. Add a timestamp to ensure uniqueness:
# Create bucket (replace [your-domain] with your actual domain)
aws s3 mb s3://[your-domain]-mail-backups-$(date +%s)

# Example output:
# make_bucket: secblues-mail-backups-1707928699
Note the full bucket name (including the timestamp). You’ll need it for the backup script.
Verify bucket was created:
# List all your buckets
aws s3 ls

# Should show:
# 2026-02-12 20:38:22 [your-domain]-mail-backups-1707928699
Create backup script:
# Create the script file
sudo nano /usr/local/bin/backup-mail.sh
Paste this script (replace placeholders with your actual values):
#!/bin/bash

# Mail backup script for S3
# Backs up Maildir and mail configuration daily

BACKUP_DATE=$(date +%Y-%m-%d-%H%M%S)
BUCKET_NAME="[your-full-bucket-name-including-timestamp]"
MAIL_USER="[your-mail-username]"
BACKUP_DIR="/tmp/mail-backup-${BACKUP_DATE}"

# Create temporary backup directory
mkdir -p ${BACKUP_DIR}

# Backup Maildir (user's mail)
tar -czf ${BACKUP_DIR}/maildir-${BACKUP_DATE}.tar.gz \
    -C /home/${MAIL_USER} \
    Maildir/

# Backup mail server configuration
tar -czf ${BACKUP_DIR}/mail-config-${BACKUP_DATE}.tar.gz \
    /etc/postfix/main.cf \
    /etc/postfix/master.cf \
    /etc/dovecot/

# Upload Maildir backup to S3
aws s3 cp ${BACKUP_DIR}/maildir-${BACKUP_DATE}.tar.gz \
    s3://${BUCKET_NAME}/maildir/

# Upload config backup to S3
aws s3 cp ${BACKUP_DIR}/mail-config-${BACKUP_DATE}.tar.gz \
    s3://${BUCKET_NAME}/config/

# Cleanup temporary files
rm -rf ${BACKUP_DIR}

echo "Backup completed: ${BACKUP_DATE}"
What this script does:
Save and exit: Ctrl+X, Y, Enter
Make the script executable:
# Set execute permission
sudo chmod +x /usr/local/bin/backup-mail.sh

# Verify permissions
ls -la /usr/local/bin/backup-mail.sh
# Should show: -rwxr-xr-x (executable)
Test the backup script:
# Run manually
sudo /usr/local/bin/backup-mail.sh
Expected output:
Backup completed: 2026-02-12-204716
Verify files were uploaded to S3:
# List all objects in bucket
aws s3 ls s3://[your-bucket-name]/ --recursive
Expected output:
2026-02-12 20:47:21   3529 maildir/maildir-2026-02-12-204716.tar.gz
2026-02-12 20:47:21  28314 config/mail-config-2026-02-12-204716.tar.gz
If you see both files, backups are working!
Schedule automatic daily backups with cron:
# Edit root's crontab
sudo crontab -e
If prompted to select an editor:
Add this line at the end:
# Daily mail backup at 2:00 AM
0 2 * * * /usr/local/bin/backup-mail.sh >> /var/log/mail-backup.log 2>&1
What this does:
2>&1 captures both stdout and stderrSave and exit: Ctrl+X, Y, Enter
Verify cron job was added:
# List crontab
sudo crontab -l

# Should show your backup line
Check cron service is running:
sudo systemctl status cron
# Should show: active (running)
Configure S3 lifecycle policy (auto-delete old backups):
Keep backups for 30 days, then automatically delete them to control costs:
# Create lifecycle policy file
cat > /tmp/lifecycle.json << 'EOF'
{
  "Rules": [
    {
      "Expiration": {
        "Days": 30
      },
      "ID": "DeleteOldBackups",
      "Status": "Enabled",
      "Prefix": ""
    }
  ]
}
EOF

# Apply policy to bucket
aws s3api put-bucket-lifecycle-configuration \
  --bucket [your-bucket-name] \
  --lifecycle-configuration file:///tmp/lifecycle.json

# Verify policy was applied
aws s3api get-bucket-lifecycle-configuration \
  --bucket [your-bucket-name]
Expected output:
{
    "Rules": [
        {
            "Expiration": {
                "Days": 30
            },
            "ID": "DeleteOldBackups",
            "Status": "Enabled",
            "Prefix": ""
        }
    ]
}
This keeps your S3 costs predictable—after 30 days, old backups are automatically deleted.
Cost estimation:
Small cost for AWS usage history plus actual backup protection.
What you’ve accomplished:
✅ AWS CLI configured and authenticated
✅ S3 bucket created
✅ Automated daily backups working
✅ 30-day retention policy
✅ AWS billing started (usage history building)
✅ Actual useful backup system
Timeline for SES:
Testing the backup:
The cron job runs daily at 2 AM. To test it now:
# Run backup manually
sudo /usr/local/bin/backup-mail.sh

# Check the log (will be created after first cron run)
tail /var/log/mail-backup.log

# Verify S3 has new files
aws s3 ls s3://[your-bucket-name]/ --recursive --human-readable
You should see increasing file counts daily.
Restoring from backup (if needed):
# List available backups
aws s3 ls s3://[your-bucket-name]/maildir/

# Download specific backup
aws s3 cp s3://[your-bucket-name]/maildir/maildir-2026-02-12-204716.tar.gz /tmp/

# Extract
cd /home/[username]
tar -xzf /tmp/maildir-2026-02-12-204716.tar.gz

# Verify mail restored
ls -la /home/[username]/Maildir/new/
Run through this comprehensive checklist to confirm everything is configured correctly.
Verify all ports are listening:
# Check all three mail ports at once
sudo ss -tlnp | grep -E ':(25|587|993)'
Expected output:
LISTEN 0    100    0.0.0.0:25     0.0.0.0:*    users:(("master",pid=31782,fd=13))
LISTEN 0    100    0.0.0.0:587    0.0.0.0:*    users:(("master",pid=31782,fd=14))
LISTEN 0    100    0.0.0.0:993    0.0.0.0:*    users:(("dovecot",pid=31055,fd=37))
All three should show “LISTEN”.
Verify firewall rules:
sudo ufw status verbose | grep -E '(25|587|993|80|443)'
Expected output:
25/tcp                     ALLOW IN    Anywhere
587/tcp                    ALLOW IN    Anywhere
993/tcp                    ALLOW IN    Anywhere
80/tcp                     ALLOW IN    Anywhere
443/tcp                    ALLOW IN    Anywhere
Re-verify all DNS records:
# A record
dig mail.[your-domain].com +short
# Should return: [your-droplet-ip]

# MX record
dig MX [your-domain].com +short
# Should return: 10 mail.[your-domain].com.

# SPF record
dig TXT [your-domain].com +short | grep spf
# Should include: "v=spf1 ip4:[your-ip] include:amazonses.com -all"

# DMARC record
dig TXT _dmarc.[your-domain].com +short
# Should return: "v=DMARC1; p=none; rua=mailto:dmarc@..."

# PTR record (reverse DNS)
dig -x [your-droplet-ip] +short
# Should return: mail.[your-domain].com.
If any fail, revisit the DNS configuration section.
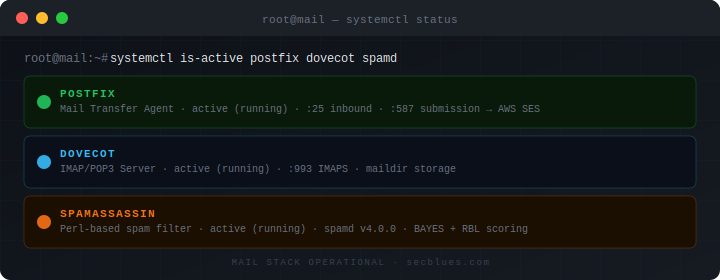
Verify all services are running:
# Postfix status
sudo systemctl status postfix --no-pager -l

# Dovecot status
sudo systemctl status dovecot --no-pager -l

# Both should show: Active: active (running)
Check for errors in logs:
# Postfix errors
sudo journalctl -u postfix -n 100 --no-pager | grep -i error

# Dovecot errors
sudo journalctl -u dovecot -n 100 --no-pager | grep -i error

# If both return nothing, that's good - no errors
Verify Postfix is using Maildir:
sudo postconf | grep home_mailbox
# Should show: home_mailbox = Maildir/
Verify TLS certificates are configured:
sudo postconf | grep smtpd_tls_cert_file
sudo postconf | grep smtpd_tls_key_file

# Both should point to /etc/letsencrypt/live/mail.[your-domain].com/
Verify SASL is enabled:
sudo postconf | grep smtpd_sasl_auth_enable
# Should show: smtpd_sasl_auth_enable = yes
Verify mail location:
sudo doveconf -n | grep mail_location
# Should show: mail_location = maildir:~/Maildir
Verify SSL is required:
sudo doveconf -n | grep "^ssl "
# Should show: ssl = required
Verify auth socket exists:
sudo ls -la /var/spool/postfix/private/auth
# Should show: srw-rw---- 1 postfix postfix
Send test email from external provider:
From Gmail, ProtonMail, or any other email service, send to: [your-username]@[your-domain].com
Monitor delivery in real-time:
# Watch logs
sudo journalctl -u postfix -f

# Press Ctrl+C when you see the delivery
Verify delivery:
# Check for "delivered to mailbox"
sudo journalctl -u postfix --no-pager | grep "status=sent"

# Example output:
# status=sent (delivered to mailbox)
Verify email file exists:
# List new mail
sudo ls -la /home/[your-username]/Maildir/new/

# Should see a file with timestamp in name
Test with command-line:
# Test IMAP over SSL
openssl s_client -connect mail.[your-domain].com:993 -quiet

# After connection, type:
a1 LOGIN [username] [password]
# Should return: a1 OK Logged in

# List mailboxes
a2 LIST "" "*"
# Should show: * LIST (\HasNoChildren) "." "INBOX"

# Logout
a3 LOGOUT
Test with email client:
Configure any IMAP client with these settings and verify:
Connection details:
IMAP:
  Server: mail.[your-domain].com
  Port: 993
  Security: SSL/TLS
  Username: [your-username]
  Password: [user's password]

SMTP (for future):
  Server: mail.[your-domain].com
  Port: 587
  Security: STARTTLS
  Username: [your-username]
  Password: [user's password]
Verify backup script runs:
# Run manual backup
sudo /usr/local/bin/backup-mail.sh

# Check output
# Should show: Backup completed: [timestamp]
Verify files in S3:
# List all backups
aws s3 ls s3://[your-bucket-name]/ --recursive --human-readable

# Should show files in maildir/ and config/ folders
Verify cron job:
# Check crontab
sudo crontab -l | grep backup-mail

# Should show: 0 2 * * * /usr/local/bin/backup-mail.sh
Verify lifecycle policy:
# Check policy
aws s3api get-bucket-lifecycle-configuration \
  --bucket [your-bucket-name]

# Should show 30-day expiration rule
Check certificate expiration:
# Check cert details
sudo certbot certificates

# Should show:
# Certificate Name: mail.[your-domain].com
# Expiry Date: [90 days from creation]
# Certificate Path: /etc/letsencrypt/live/mail.[your-domain].com/fullchain.pem
Verify auto-renewal:
# Check renewal timer
sudo systemctl status certbot.timer

# Should show: Active: active (waiting)
Test renewal process:
# Dry run (doesn't actually renew)
sudo certbot renew --dry-run

# Should end with: Congratulations, all simulations succeeded
Check file permissions on sensitive files:
# Maildir should be 700 (user-only access)
sudo ls -ld /home/[username]/Maildir
# Should show: drwx------

# Certificate private key should be 600
sudo ls -la /etc/letsencrypt/live/mail.[your-domain].com/privkey.pem
# Should show: -rw-r--r-- (lrwxrwxrwx if symlink)

# Postfix config should be 644
sudo ls -la /etc/postfix/main.cf
# Should show: -rw-r--r--
Verify no open relay:
# Test if server allows relaying without auth
telnet mail.[your-domain].com 25

# After connection, type:
HELO test.com
MAIL FROM: [email protected]
RCPT TO: [email protected]

# Should get: 554 5.7.1 Relay access denied
# This is GOOD - server refuses to relay
Run through this checklist and verify each item:
If all items are checked, your mail server is fully operational for receiving email.
What’s working:
What’s pending:
You’ve built a production-ready mail server from scratch. Let’s review what you’ve accomplished and what comes next.
Infrastructure:
Mail Services:
Backup and AWS Integration:
Fully Functional:
Pending Configuration:
Current expenses:
Cost breakdown by function:
Comparison to alternatives:
Current status: Production access denied due to new account
What we learned: AWS requires established usage history before approving SES for new accounts. This is common anti-spam policy, not a rejection of your use case.
The path forward:
Why we’re not giving up on SES:
Timeline: 60-90 days until SES reapplication
The next article will cover:
1. SMTP2GO SMTP Relay (Immediate Solution)
Why SMTP2GO:
2. SpamAssassin Configuration
3. Security Hardening
4. Monitoring and Maintenance
Through this deployment, you’ve gained hands-on experience with:
Linux System Administration:
Email Infrastructure:
Cloud Infrastructure:
Troubleshooting:
Key file locations:
Configuration Files:
/etc/postfix/main.cf          - Postfix main configuration
/etc/postfix/master.cf        - Postfix service configuration
/etc/dovecot/conf.d/          - Dovecot configuration directory
/etc/letsencrypt/live/        - TLS certificates
/usr/local/bin/backup-mail.sh - Backup script

Mail Data:
/home/[username]/Maildir/     - User mailbox
/var/spool/postfix/           - Postfix queue and sockets

Logs:
journalctl -u postfix         - Postfix logs
journalctl -u dovecot         - Dovecot logs
/var/log/mail-backup.log      - Backup logs (after first cron run)

AWS:
~/.aws/credentials            - AWS CLI credentials
~/.aws/config                 - AWS CLI configuration
Important commands:
# Service management
sudo systemctl restart postfix
sudo systemctl restart dovecot
sudo systemctl status postfix dovecot

# View logs
sudo journalctl -u postfix -f
sudo journalctl -u dovecot -n 100

# Check mail queue
sudo mailq

# Test configuration
sudo postfix check
sudo doveconf -n

# Manual backup
sudo /usr/local/bin/backup-mail.sh

# List S3 backups
aws s3 ls s3://[bucket-name]/ --recursive
Building a mail server is one of the more complex self-hosting projects, which is why many people avoid it. But you’ve done it the right way:
You now have a fully functional mail server that receives email reliably, integrates with any email client, and provides the foundation for complete email independence.
Part 3 will complete the picture by adding outbound sending capabilities and additional security layers, giving you a production-ready mail server suitable for professional correspondence.
Published:
Last updated:
Time to complete: 2-3 hours
Part of series: Building a Secure Email Server
Next: Part 3 – Outbound Relay, Spam Filtering, and Security Hardening